OpsGenie
Prepare OpsGenie
You'll need an API integration set up in OpsGenie to receive the incoming Lightup alerts. One might already be available or you might need to create one— either way, you start on your OpsGenie Team dashboard.
-
In the left nav of your OpsGenie Team dashboard, select Integrations.
-
You need an API integration to work with Lightup. You can hover over the icon to the left of an integration's name to verify it's an API integration. If you see API integrations listed, click the name of an integration to open its details; if it looks suitable make note of the API Key.
If you found an existing API integration to use, you're done— just be prepared to provide its API Key to workspace admins when they want to add the OpsGenie integration to their workspace.
-
If no API integrations are listed or you can't find one you want to use, above the list click Add integration.
-
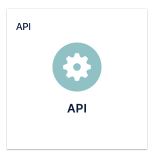
On the Add Integration list, under All Products select API:

-
Enter an Integration name, optionally select an Assignee team, and then click Continue.
-
The new integration opens. At the top right, click Turn on integration to make it available.
-
Make note of the API Key— workspace admins will need this key when they add the OpsGenie integration to their workspace as an alerting channel. Note that anyone who can open the OpsGenie Team dashboard can see the new integration listed and can click its name to find out its API Key.
-
If desired, edit the Incoming Rules. For help with this, see OpsGenie's page, What are the integration types and actions?.
Add an OpsGenie alerting channel
- Select the workspace where you want to add an integration, and then select Integrations on the left panel
- Select Create Integration +.
- In the list that appears, choose OpsGenie.
- In the Add Opsgenie Integration panel, provide the following:
- An Integration Name
- The API Key for the OpsGenie integration you want to add— you can get this key from the person who prepared OpsGenie for your Lightup integration. Or, open your OpsGenie Team dashboard, select the Integrations tab in the laft nav to see the available integrations, and then select one to review its details, including the API Key.
- Optionally:
- Adjust the Priority.
- Set Responder Type and enter at least one Responder Name.
- To add another Responder Type, select + Add.
- Change the Host URL.
- Add any tags.
- At the bottom, select Send Test Message.
- When the test succeeds, at the top right select Add.
Updated 5 months ago
