Enable table auto metrics
You can use Explorer to enable a table's auto metrics:
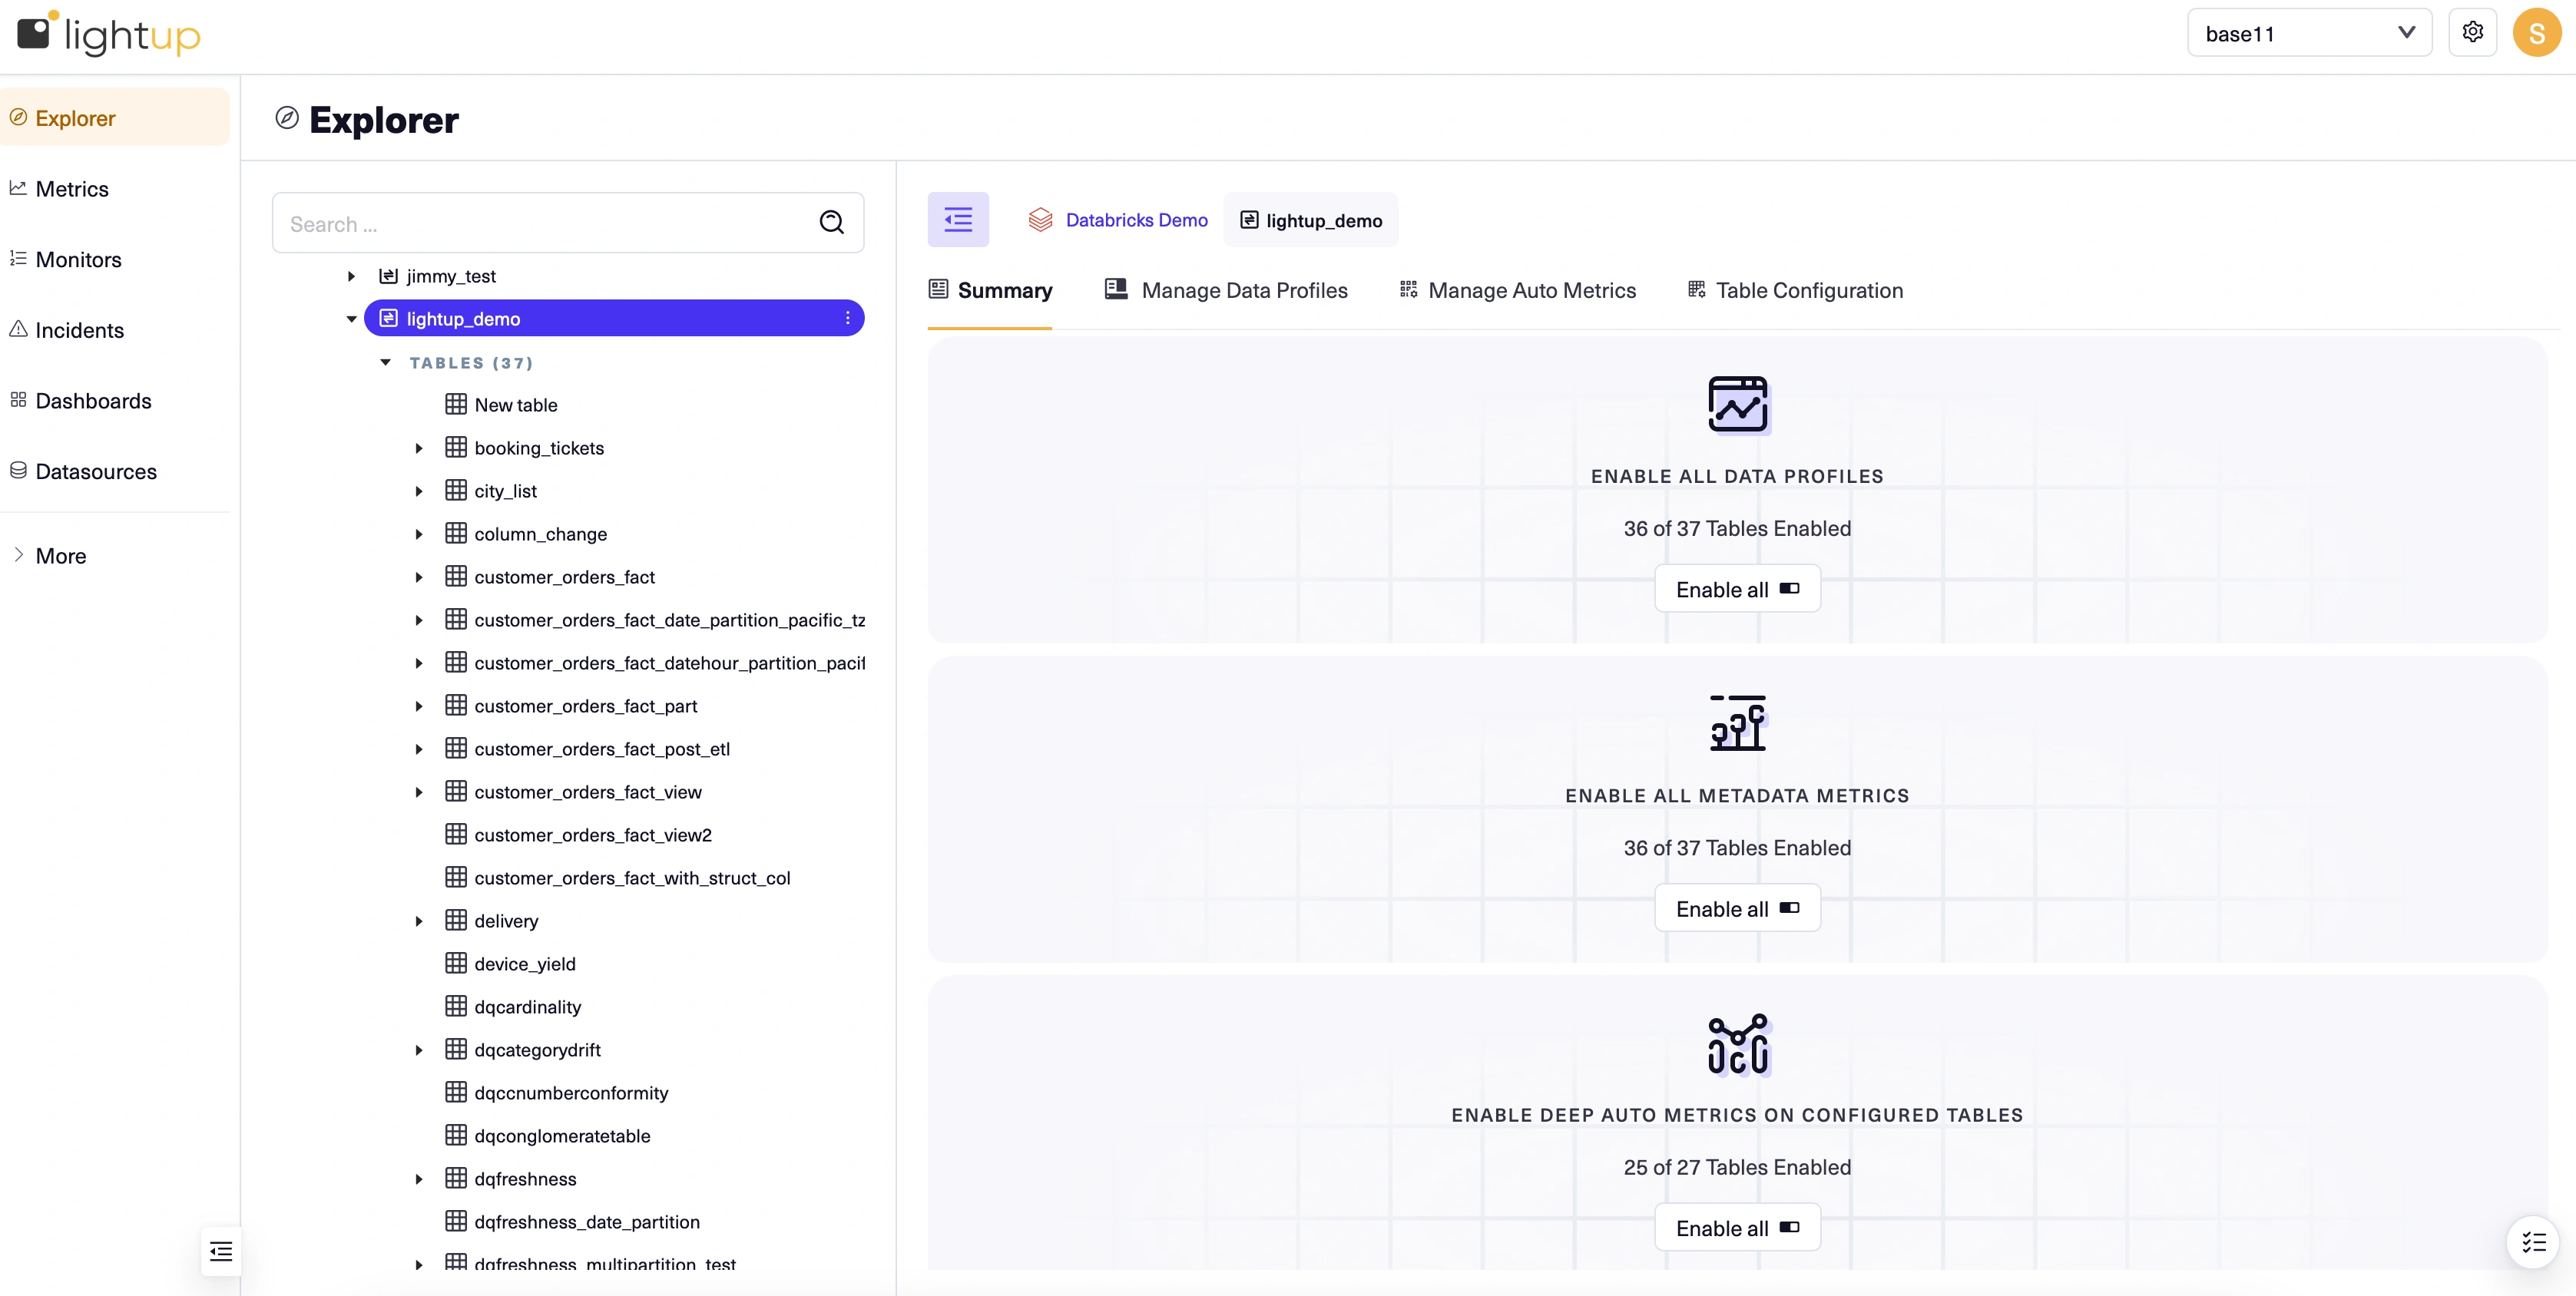
- You can enable all metadata metrics for tables inside active schemas by using the buttons on the Summary tab of a datasource or schema. Note that this method only enables metadata metrics— it doesn't provide a way to enable deep auto metrics.
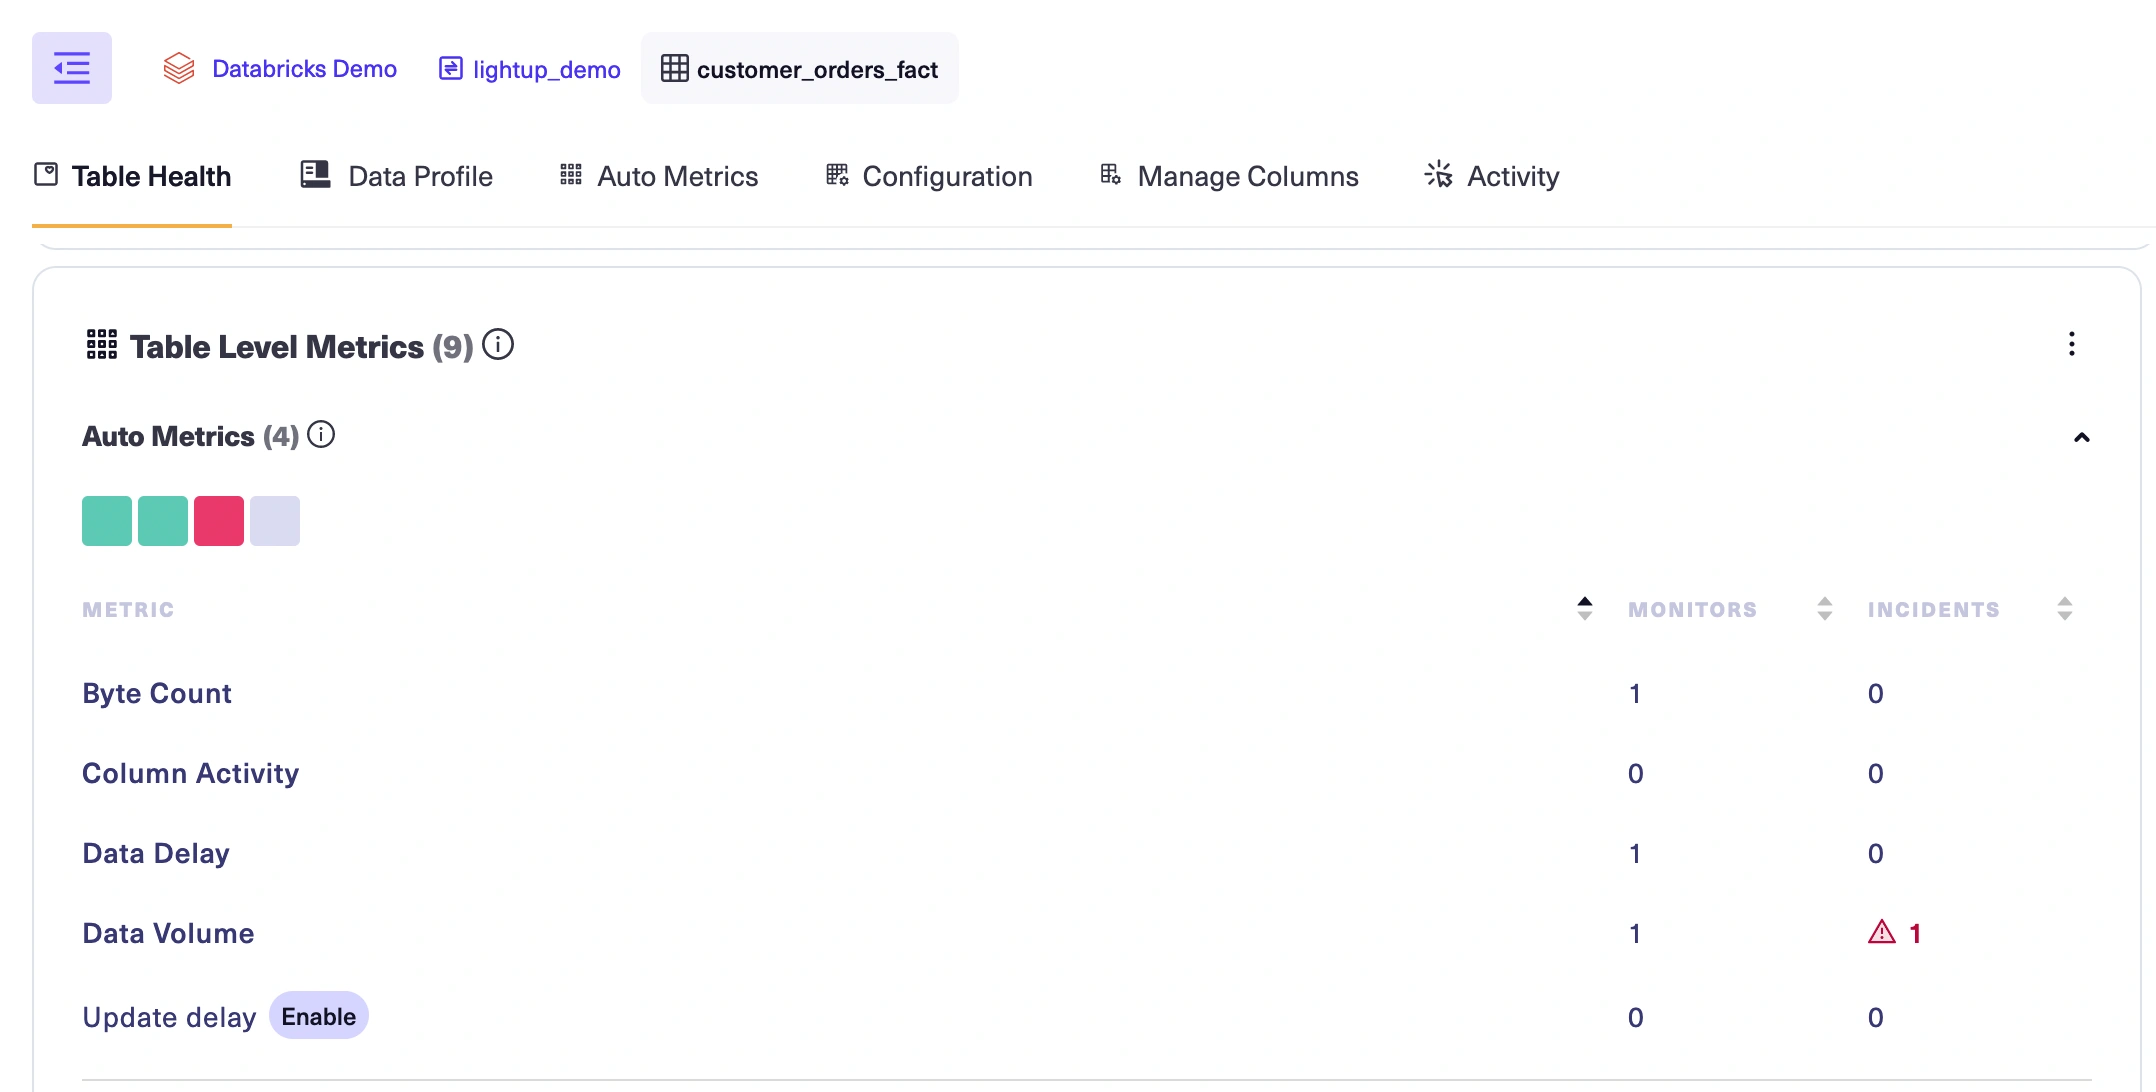
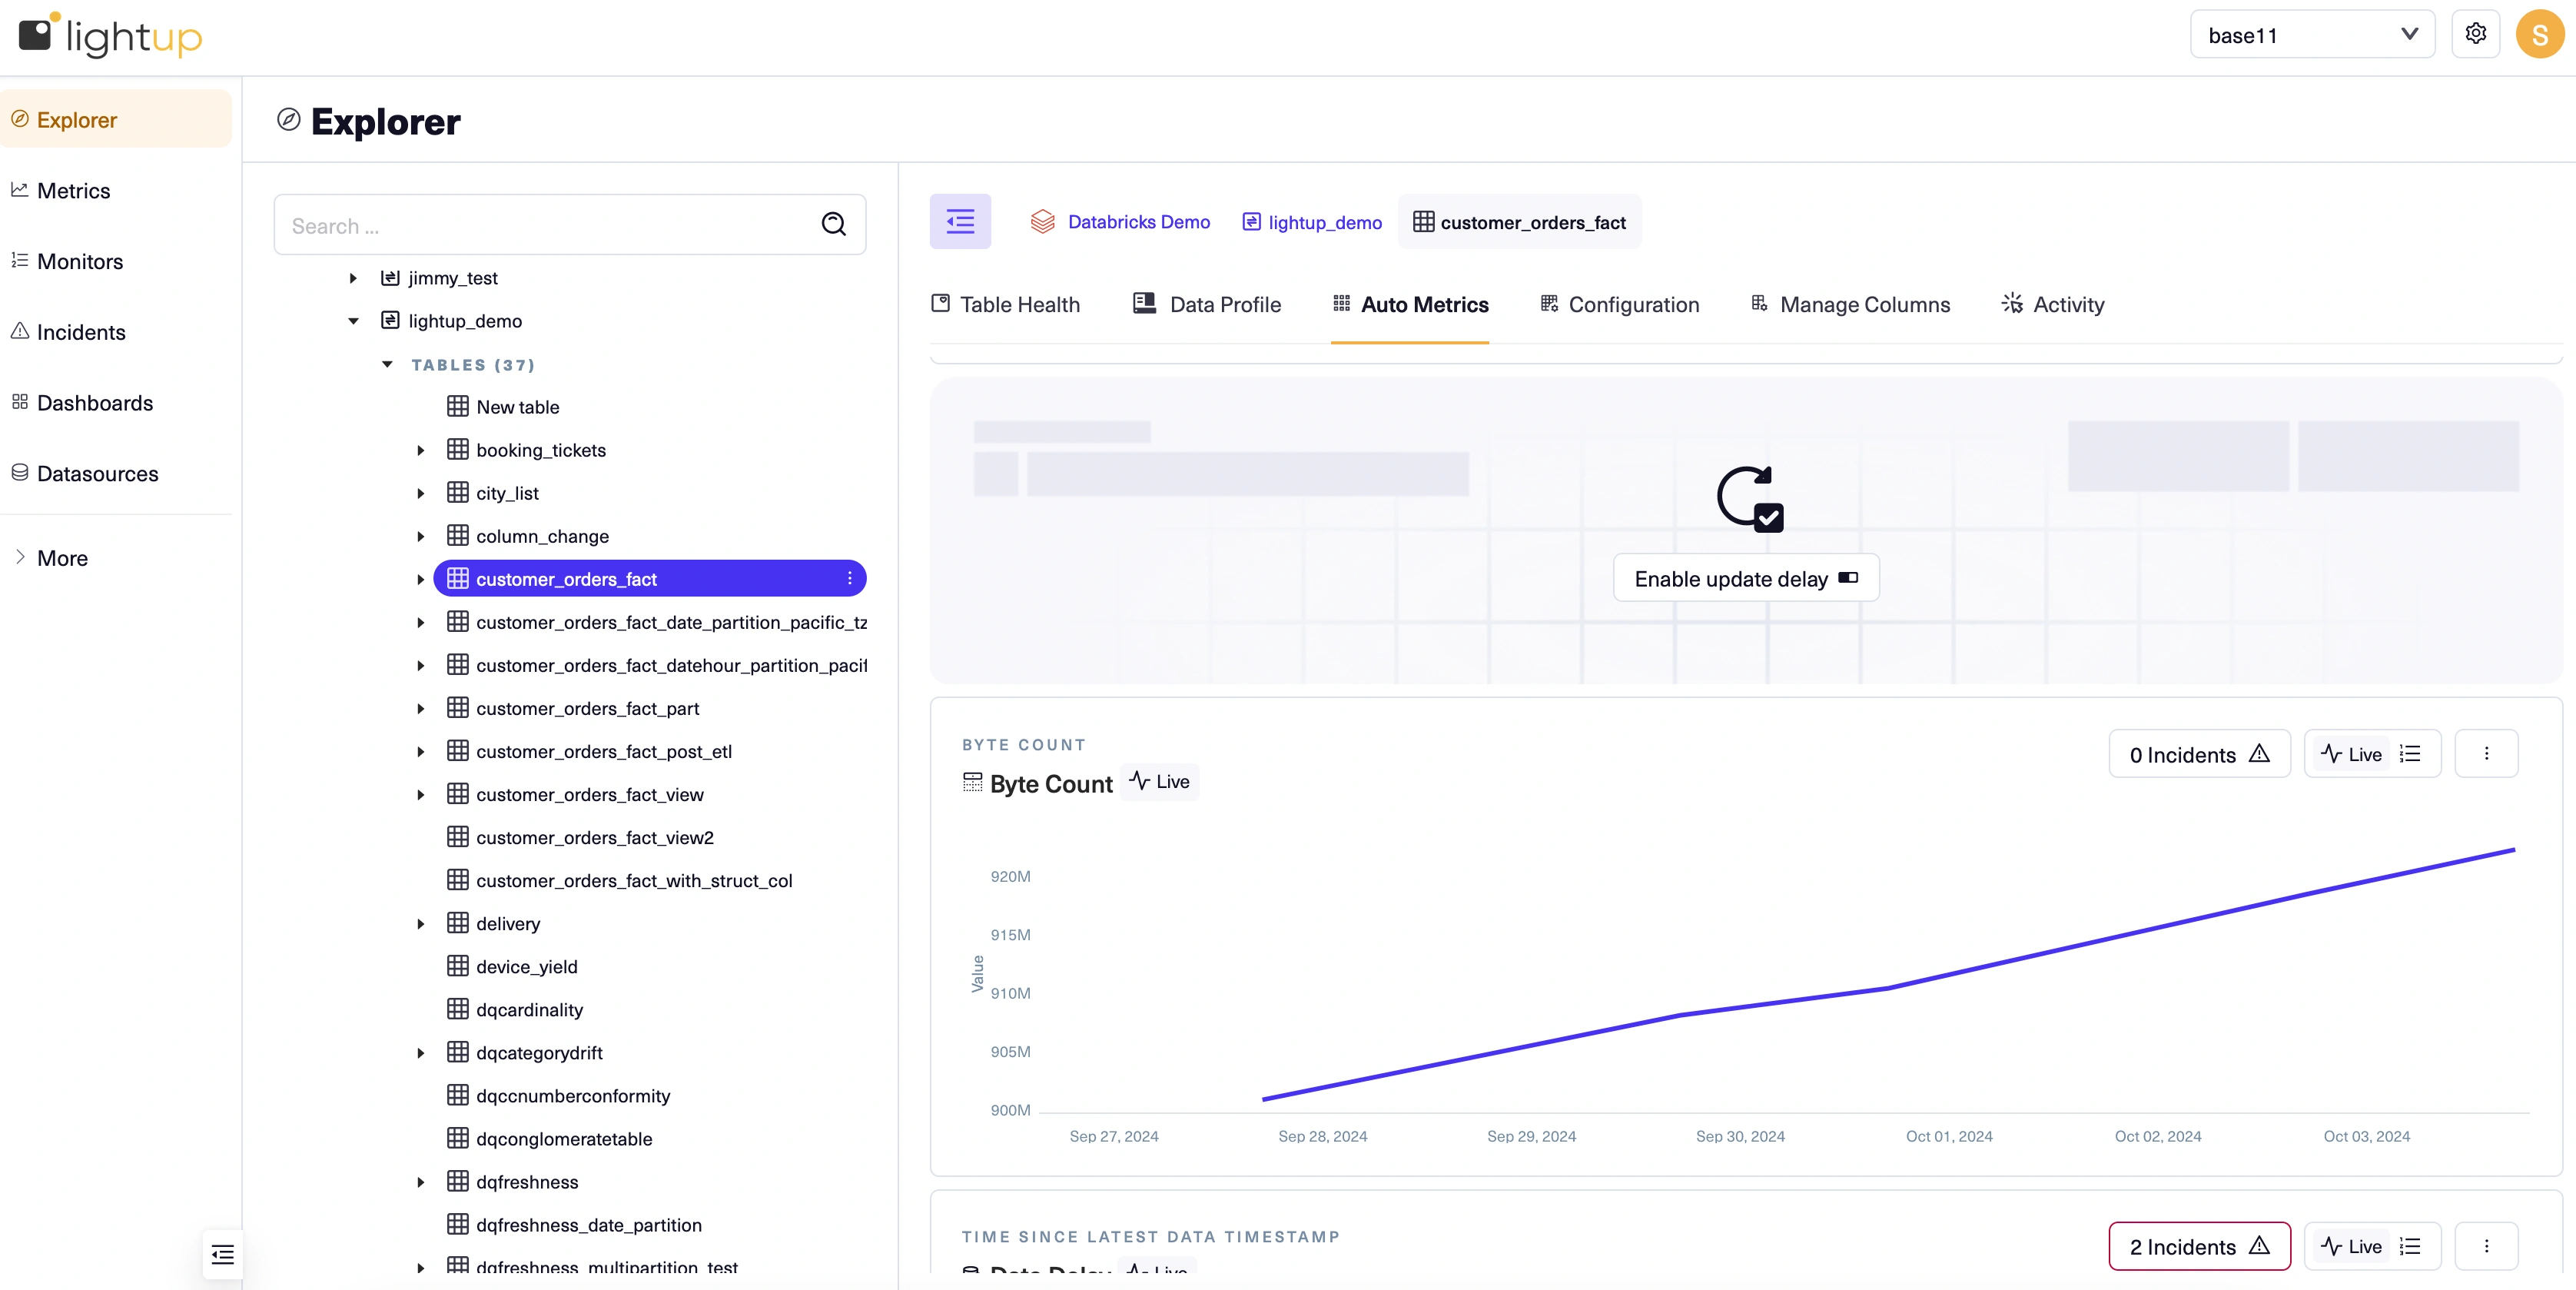
- You can enable any of one table's auto metrics by selecting the table in the Explorer tree, and then using the buttons on its Table Health tab or on its Auto Metrics tab.
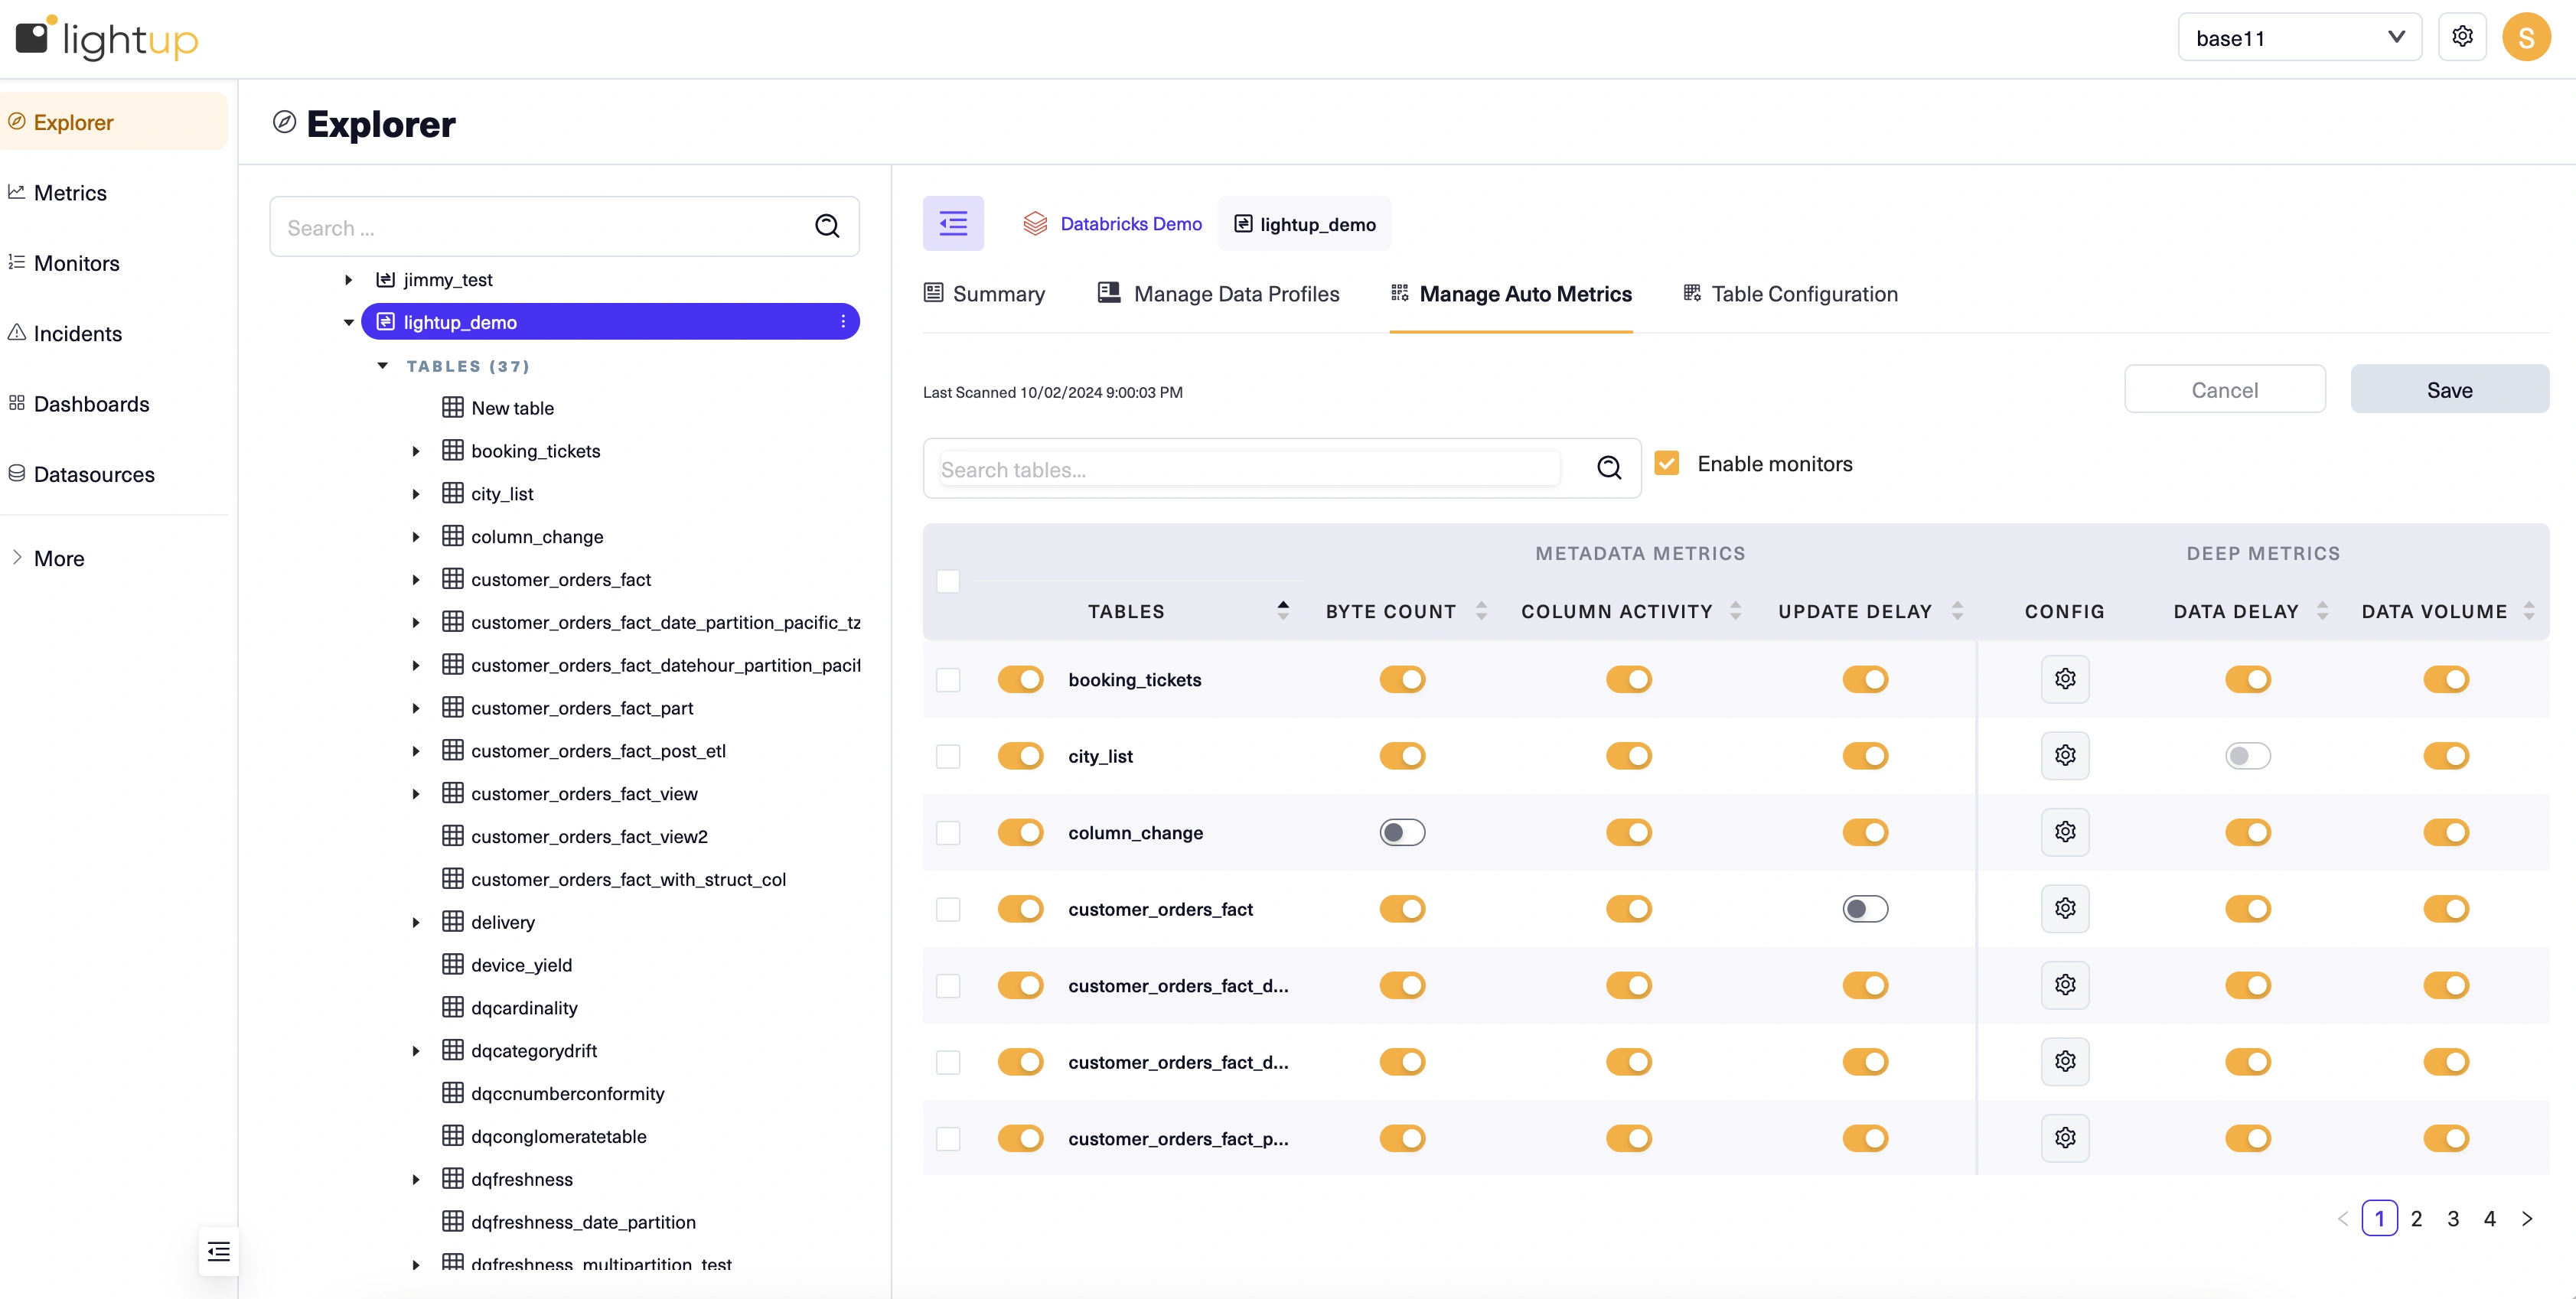
- You can enable auto metrics for one or more tables in a schema by selecting the schema in the Explorer tree, and then using the toggles on the Manage Auto Metrics tab.
Enable all metadata metrics for tables in active schemas
You can enable metadata metrics for all tables in a datasource or schema. For a datasource, only tables inside the datasource's active schemas are affected.
-
Select the datasource or schema in the Explorer tree, and then select its Summary tab.

-
On the Summary tab, under Enable All Metadata Metrics, select Enable all.
Zero-config of auto metricsIf you have chosen to Auto-configure metrics as part of the datasource governance settings, then auto metrics will get enabled automatically for the tables in any newly enabled schema. (Note: currently only metadata metrics will be auto-configured)
Enable a table's auto metrics
Note: these procedures only work for tables that are already visible in the Explorer tree.
Enable auto metrics on the Table Health tab
-
Select a table in the Explorer tree, and then select its Table Health tab.

-
In the Table Level Metrics section, under Auto Metrics, select Enable for each auto metric you want to enable. If the table isn't configured yet, first select Configure table beside a deep auto metric to configure the table. Then, after you save the table configuration, select Enable for each deep auto metric you want to enable.
Enable auto metrics on the Auto Metrics tab
-
Select a table in the Explorer tree, and then select its Auto Metrics tab.

-
Select the button for each auto metric you want to enable. For deep auto metrics, if the table isn't configured yet the button lets you configure it— then you can enable the auto metric. Charts for enabled auto metrics appear above the buttons you use to enable the remaining auto metrics, so you might have to scroll down.
Note that for Microsoft SQL datasources, the Update delay auto metric is only reliable for indexed tables, so you should check each table's data profile to verfiy that it's indexed before you enable Update delay.
Enable auto metrics for tables in a schema
-
Select a schema in the Explorer tree, and then select its Manage Auto Metrics tab.

-
For each auto metric you want to enable, switch on any active toggle. Note that you can select multiple tables using the checkboxes on the left, and then enable auto metrics for them by switching on the toggle for any of the selected tables.
-
To enable deep auto metrics, you must first configure the table. You can select Not Configured beside the name of any unconfigured table to configure it. After you save the table's configuration its deep auto metrics toggles become active.
Updated 6 months ago
