
Snowflake
Lightup account setup
Run the following SQL in a Snowflake database to prepare an account for Lightup.
- You must have at least the ACCOUNTADMIN role to set up new accounts.
- This SQL only grants access to one database. Consider creating a data warehouse for the databases you want to monitor, and then creating a Lightup login and role there.
- If you are connecting to an imported database, you must grant imported privileges on the database.
-- change role to ACCOUNTADMIN
use role ACCOUNTADMIN;

-- create role for lightup
create role if not exists lightup_role;

-- grant usage on warehouse
grant usage on warehouse compute_wh to role lightup_role;

-- grant access to data assets with the database
grant usage on database testdb to role lightup_role;
grant usage on all schemas in database testdb to role lightup_role;
grant usage on future schemas in database testdb to role lightup_role;

grant select on all tables in database testdb to role lightup_role;
grant select on future tables in database testdb to role lightup_role;

-- create user and assign to role
create user if not exists lightup_user password = 'redacted';
grant role lightup_role to user lightup_user;
alter user lightup_user set default_role = lightup_role;
alter user lightup_user set default_warehouse = compute_wh;
Connect to a Snowflake datasource
- In the left pane select Datasources*
- In the main page select Create Datasource +.
- Enter a Datasource Name, then for Connector Type select Snowflake.
- Under Configure connector, provide the following inputs:
- Host - The account ID of the datasource, for example updwnz-cba54045. For help, see Snowflake's Account Identifiers.
- Database Name - The name of the database you're connecting to. Each datasource can only connect to one database. If you need to connect to more than one, you'll need to create a datasource for each.
- Username - Enter lightup_user.
- Password - The username account's password.
- After entering the required settings and any optional settings that apply, below the Configure connector section select Test Connection.
- After a successful connection test, select Save.
- Your new datasource appears in the list of available datasources. By default, these are listed in alphabetical order, so you might have to scroll or change the sort order to see your new datasource.
Optional settings
- Warehouse name - Specify a Snowflake warehouse for the connection. Read about Snowflake USE WAREHOUSE.
- Role - Specify a role to use for connecting. Read about Snowflake USE ROLE.
Advanced/Schema scan frequency
You can adjust how often scans run for a datasource.
- In section 3 - Advanced, select a value for Schema scan frequency: Hourly, Daily, or Weekly.
Query Governance
Snowflake datasources support all query governance features.
Date/time data types
These Snowflake date/time data types are supported:
- DATE
- TIMESTAMP_LTZ
- TIMESTAMP_NTZ
- TIMESTAMP_TZ
Object types
These Snowflake object types are supported:
Best Practices
Lightup, by default, runs all metrics according to predefined schedules (i.e. beginning of the hour, beginning of the day, etc). In this case, when many metrics are needing to run, there can be a queueing of the metrics which has the possibility of keeping the Snowflake VDW awake, having an impact on Snowflake Credits. As a result, Lightup recommends the following best practices to use Snowflake efficiently:
-
Co-locate Lightup with other data pipeline tasks (dbt, snowpipe, etc.). You can do this by specifying which VDW and Role Lightup needs to use in the Datasource configuration page
-
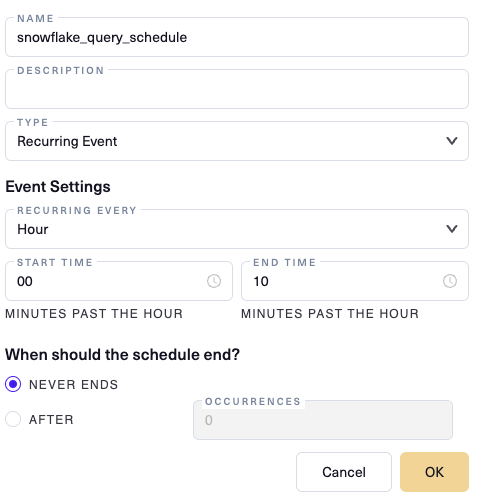
Create a recurring schedule for Lightup to use as a metric execution window
-
Example schedule that limits query execution to the first 10 minutes of every hour
-
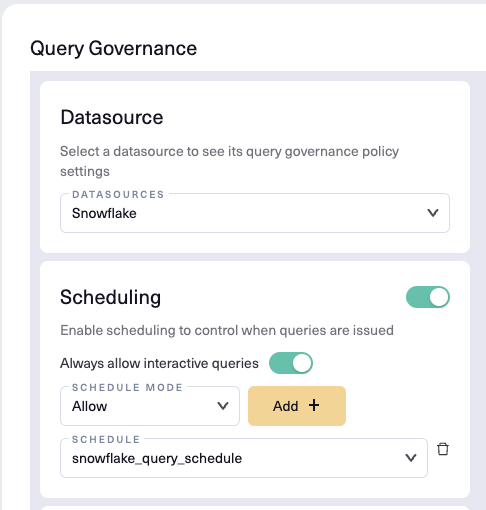
Applying the schedule to Snowflake using Query Governance
-
-
Updated 10 months ago