
Configure datasources
After you have a workspace ready, you'll want at least one datasource. A datasource is a connection from inside a workspace to a supported database. The data assets in a datasource (schemas, tables, columns) are the subject of all data quality management actions and options for the source database, within the workspace.
A DBA must set up a Lightup account in any source database to enable Lightup datasource connections. Lightup users will need some information about the source database and the Lightup account in order to create a datasource connection.
Connect to a datasource
You must have the Workspace Admin role to connect to a datasource, or to edit an existing datasource connection. After you connect to a datasource it becomes available to others for data quality analysis.
A datasource exists within a workspace— it points to a source database. You can add a datasource connection in each workspace where you need it. This allows people working in different workspaces to independently analyze and monitor the same source databases.
Each type of datasource has its own inputs required for connecting to it. For steps, see the datasource's page in the following list.
- Amazon S3 bucket (Beta)
- Athena
- Azure Blob Storage (Beta)
- BigQuery
- Databricks
- Dremio
- Greenplum
- Hive
- Incorta
- Microsoft SQL
- MySQL
- Oracle
- Postgres
- Redshift
- Snowflake
- Teradata
- SAP HANA
Scan a datasource for changes
Lightup regularly scans datasources for changes, but you can also initiate a scan manually.
- With the datasource selected in Explorer, select Actions > Manage Schemas.
- Near the top-right of the modal, select Run Manual Scan.
- The scan is queued to run as soon as possible. To stop a running scan, select Cancel Scan.
Enable data catalog integration
You can enable integration with an Alation or Atlan data catalog for datasources that are in both Lightup and the data catalog. Note that an App Admin must first add the data catalog integration to your Lightup instance.
-
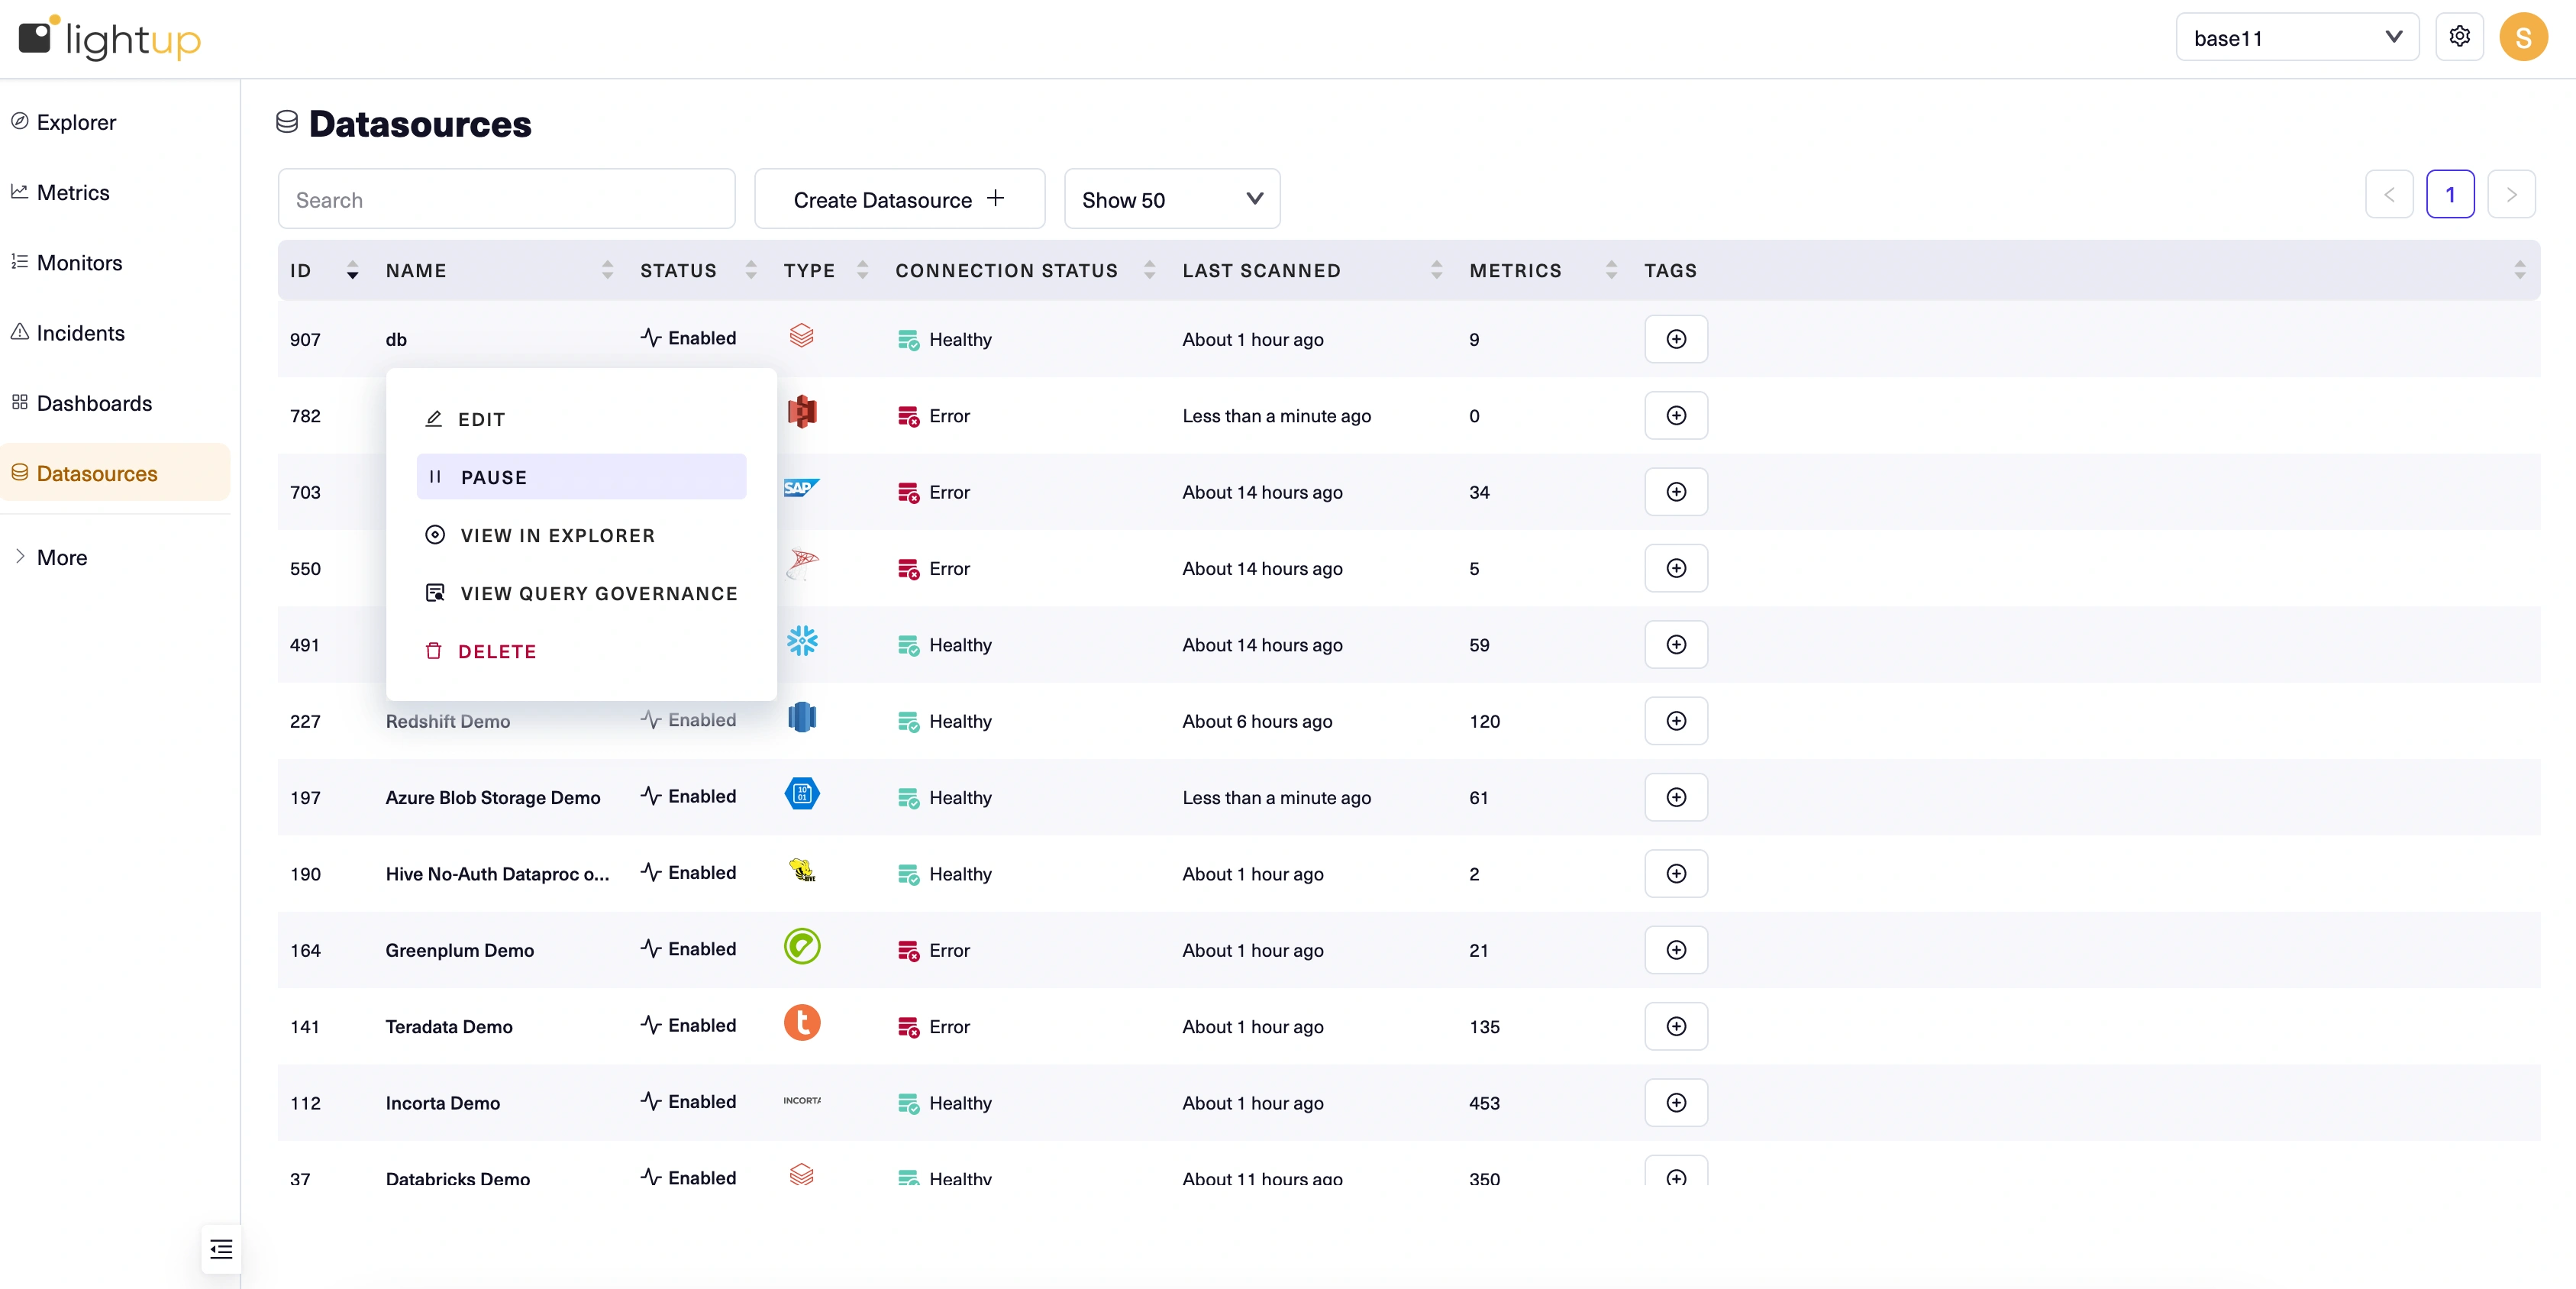
On the workspace menu, select Datasources.
-
In the main page, select the datasource's name to open its Datasource menu.
-
Select Edit. The datasource's configuration details open in the main page.
-
Scroll down below the Connection Settings. If the datasource is in your data catalog, an Alation integration and/or Atlan integration section appears:
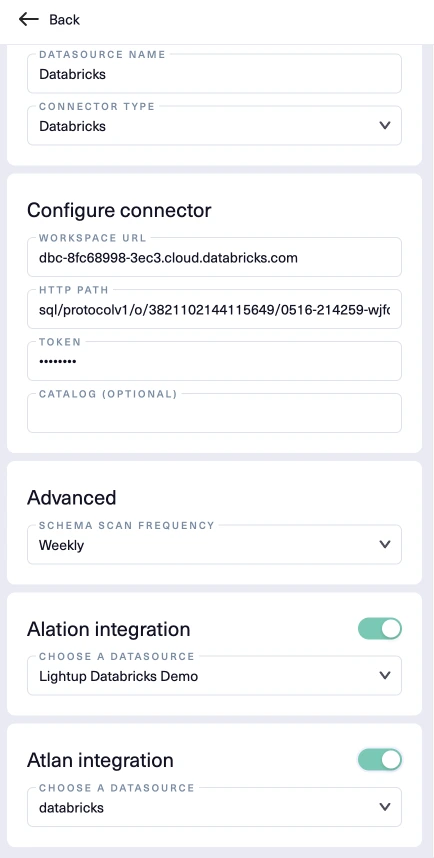
- Move either toggle to the right to enable the data catalog integration for the datasource.
- Under Choose a datasource, select the source you want to include in regular Health updates to the data catalog.
-
Select Save to complete the process.
Disabling a datasource
From the datasources list page, you can disable a datasource. Disabling a datasource causes all the metrics and monitors on the datasource to be deleted.
Pausing a datasource
From the datasources list page, you can pause a datasource. Disabling a datasource causes all the metrics and monitors on the datasource to be paused.
Updated 11 months ago