
Athena
Steps to prepare and connect to Athena
Overview
More details about Athena can be found on the AWS website: Interactive SQL - Amazon Athena
Athena needs to access S3 buckets where data is stored and also S3 buckets where the query results are stored.
Before you start, please note down the names of the buckets where data is stored as well as where the Athena result sets will be stored. Ideally, these should be 2 different buckets in order to keep the permissions separated. Please create a query results bucket if needed.
Create an IAM User
In this example we are creating a user named lightup-athena-read-only
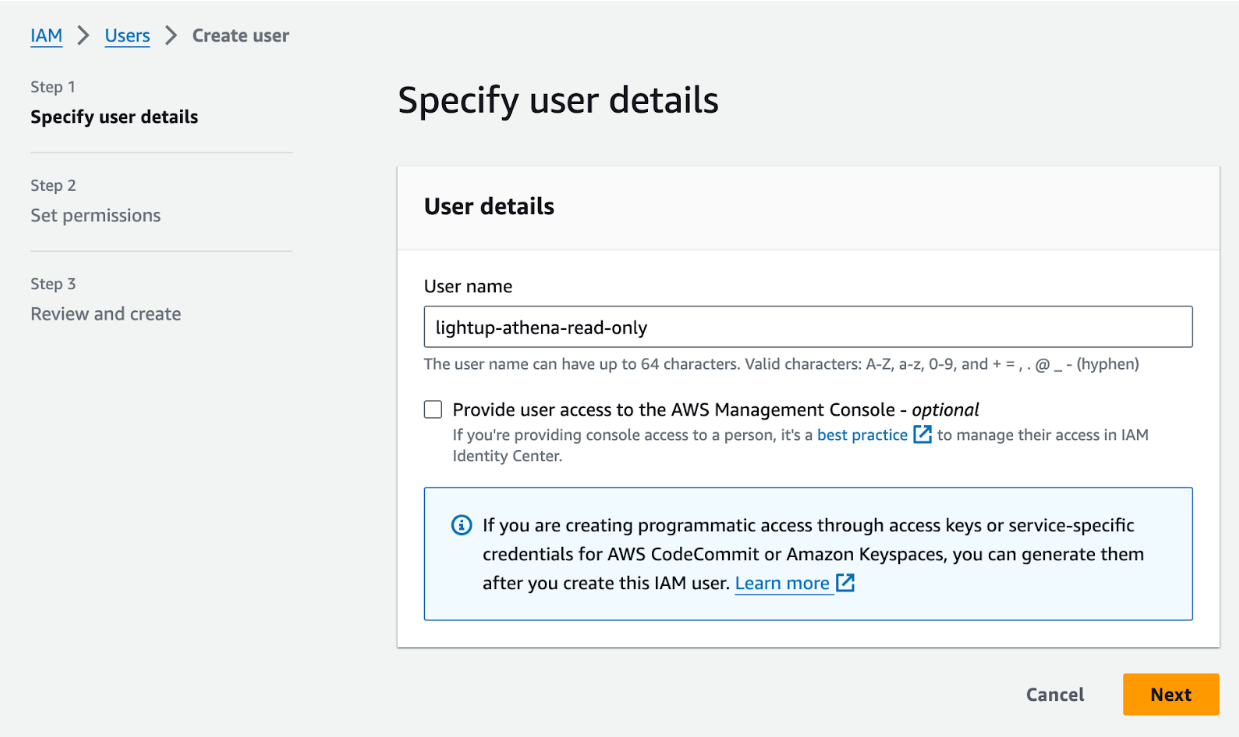
Go to IAM/Users and click on Create User
Click: Next
Attach Policies
We will attaching 2 policies to the user, this will include:
- Access to S3 buckets
- Access to Athena, Glue and other services needed by Athena
Create and attach S3 bucket policy for data, query results
As discussed earlier, we need to create an S3 policy to allow user to access data bucket (read-only) as well as the query result set bucket (read-write)
Choose Attach existing policies directly
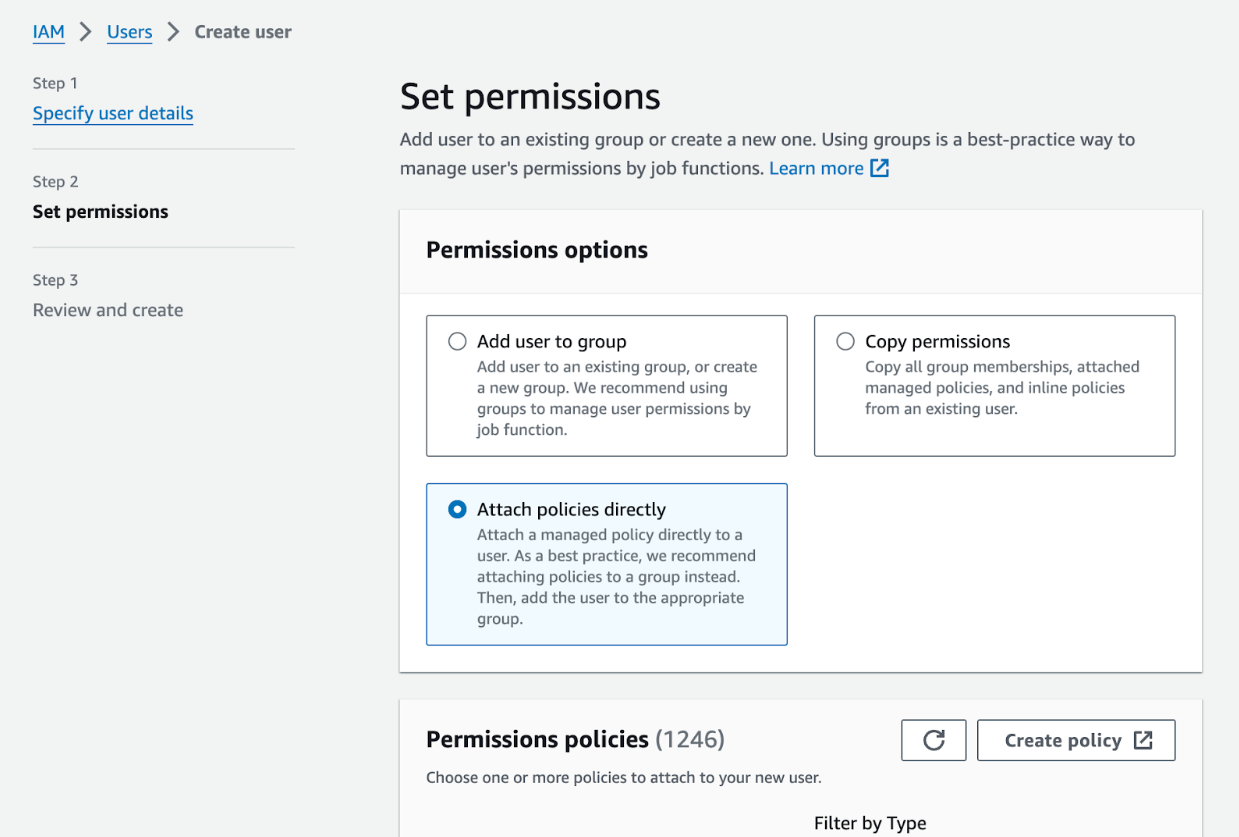
Then click on Create Policy, use JSON
This will launch a separate tab or window so, after this step is done, you will have to go back to the create user workflow.
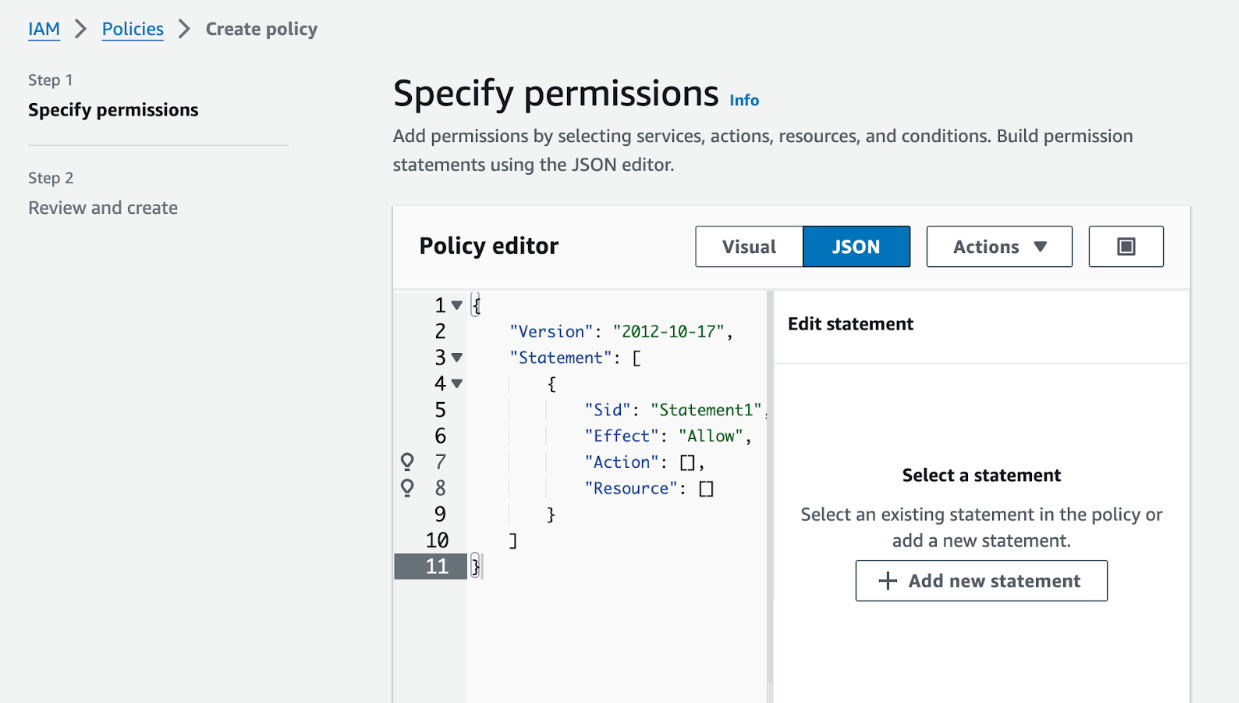
Please paste in the JSON below (AFTER making the necessary edits). Please note that DATA_BUCKET and RESULTS_BUCKET keywords need to be replaced by the appropriate S3 bucket names that were described earlier in this doc:
{
    "Version": "2012-10-17",
    "Statement": \[
        {
            "Effect": "Allow",
            "Action": [
                "s3:GetObject",
                "s3:ListBucket"
            ],
            "Resource": [
                "arn:aws:s3:::DATA_BUCKET/*",
                "arn:aws:s3:::DATA_BUCKET"
            ]
        },
        {
            "Effect": "Allow",
            "Action": [
                "s3:GetBucketLocation",
                "s3:GetObject",
                "s3:ListBucket",
                "s3:ListBucketMultipartUploads",
                "s3:ListMultipartUploadParts",
                "s3:AbortMultipartUpload",
                "s3:CreateBucket",
                "s3:PutObject",
                "s3:PutBucketPublicAccessBlock"
            ],
            "Resource": [
                "arn:aws:s3:::RESULTS_BUCKET/*",
                "arn:aws:s3:::RESULTS_BUCKET"
            ]
        }
    ]
}
Click Next and name the policy
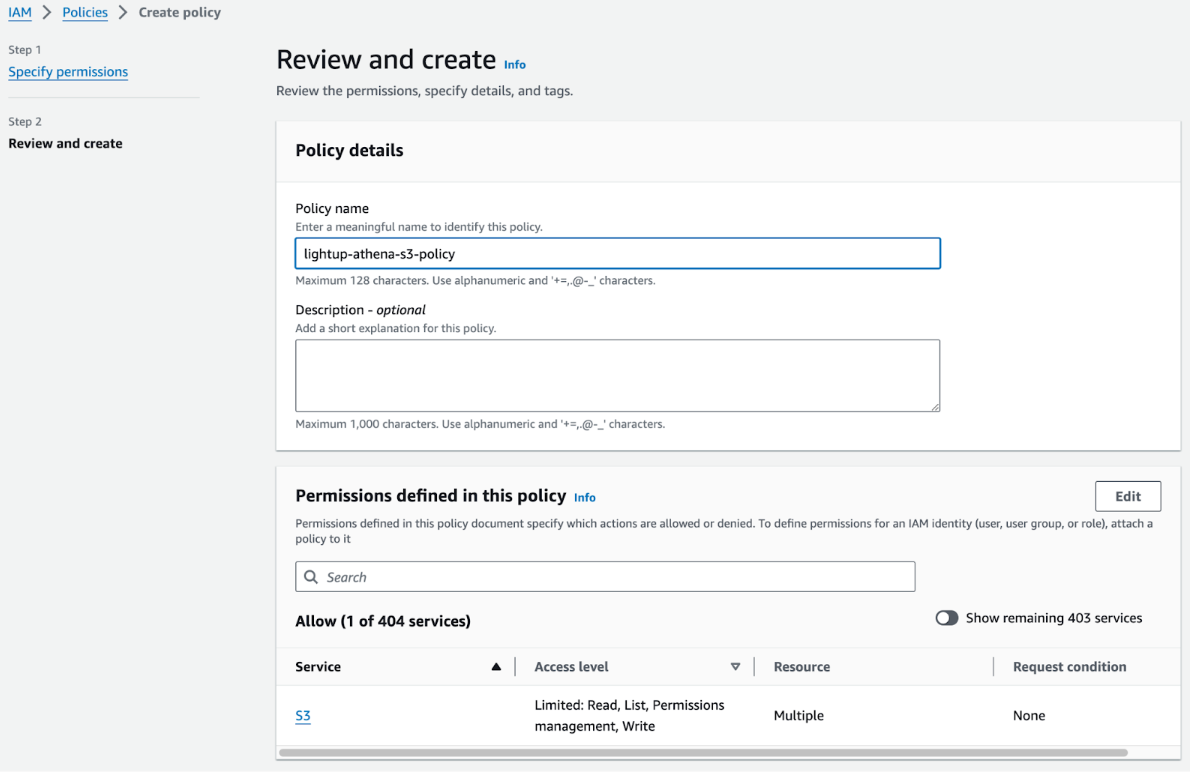
Once the policy is created, go back to the tab or window where the user was being created.
Search for and attach this newly created policy. NOTE: You may need to refresh the policies to see the newly created policy.
Attach AWSQuicksightAthenaAccess policy
Once the S3 policy is attached, search for and attach the AWS managed AWSQuicksightAthenaAccess policy. This allows the access to Athena as well to Glue for metadata.
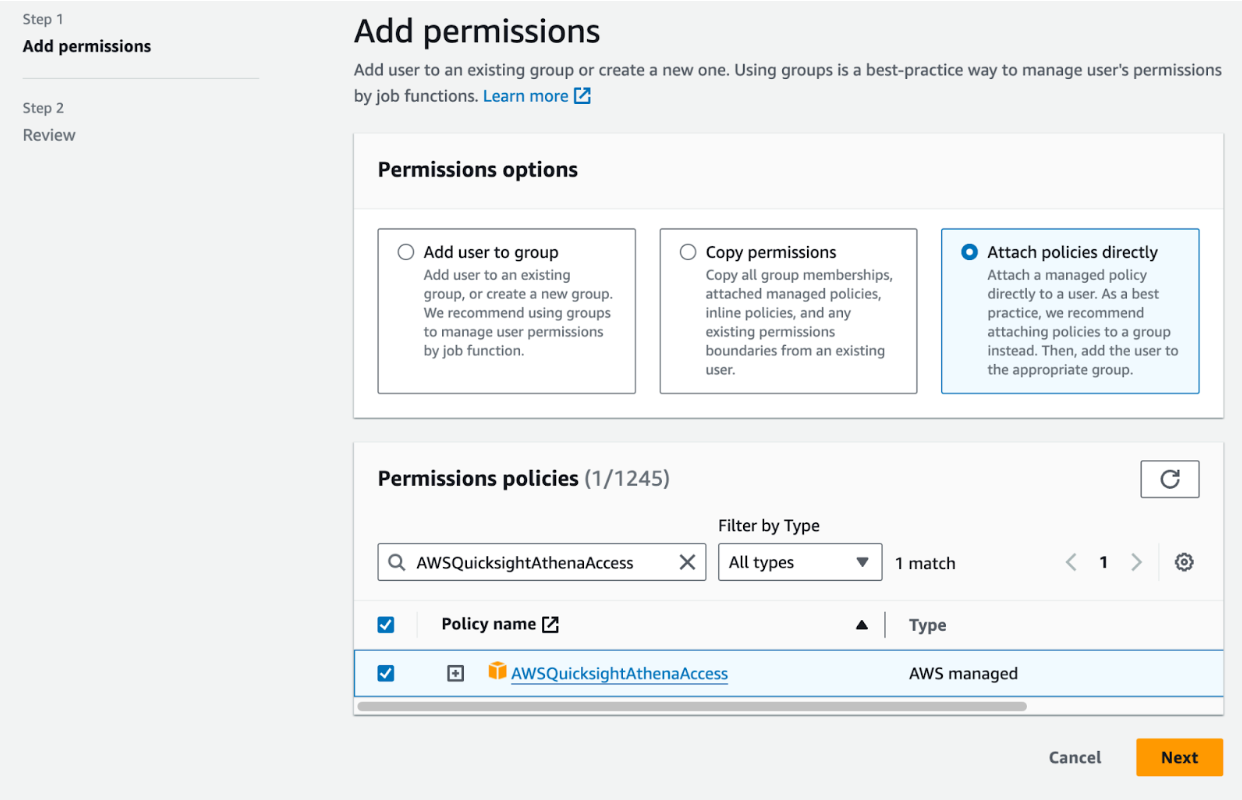
Verify that both policies have been added
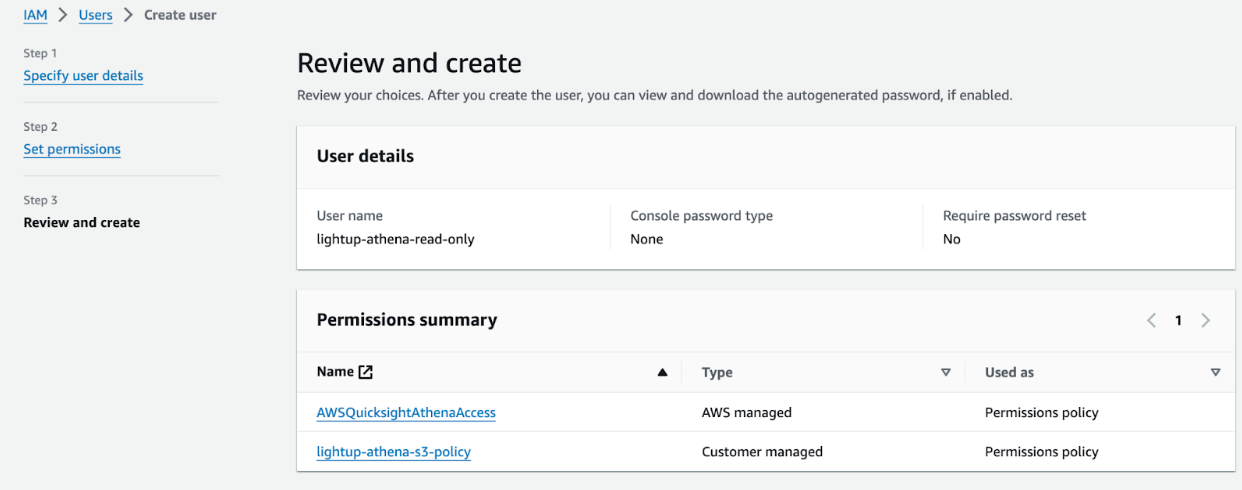
Save the user with these permissions.
Generate access keys
Generate access keys for the user that was created.
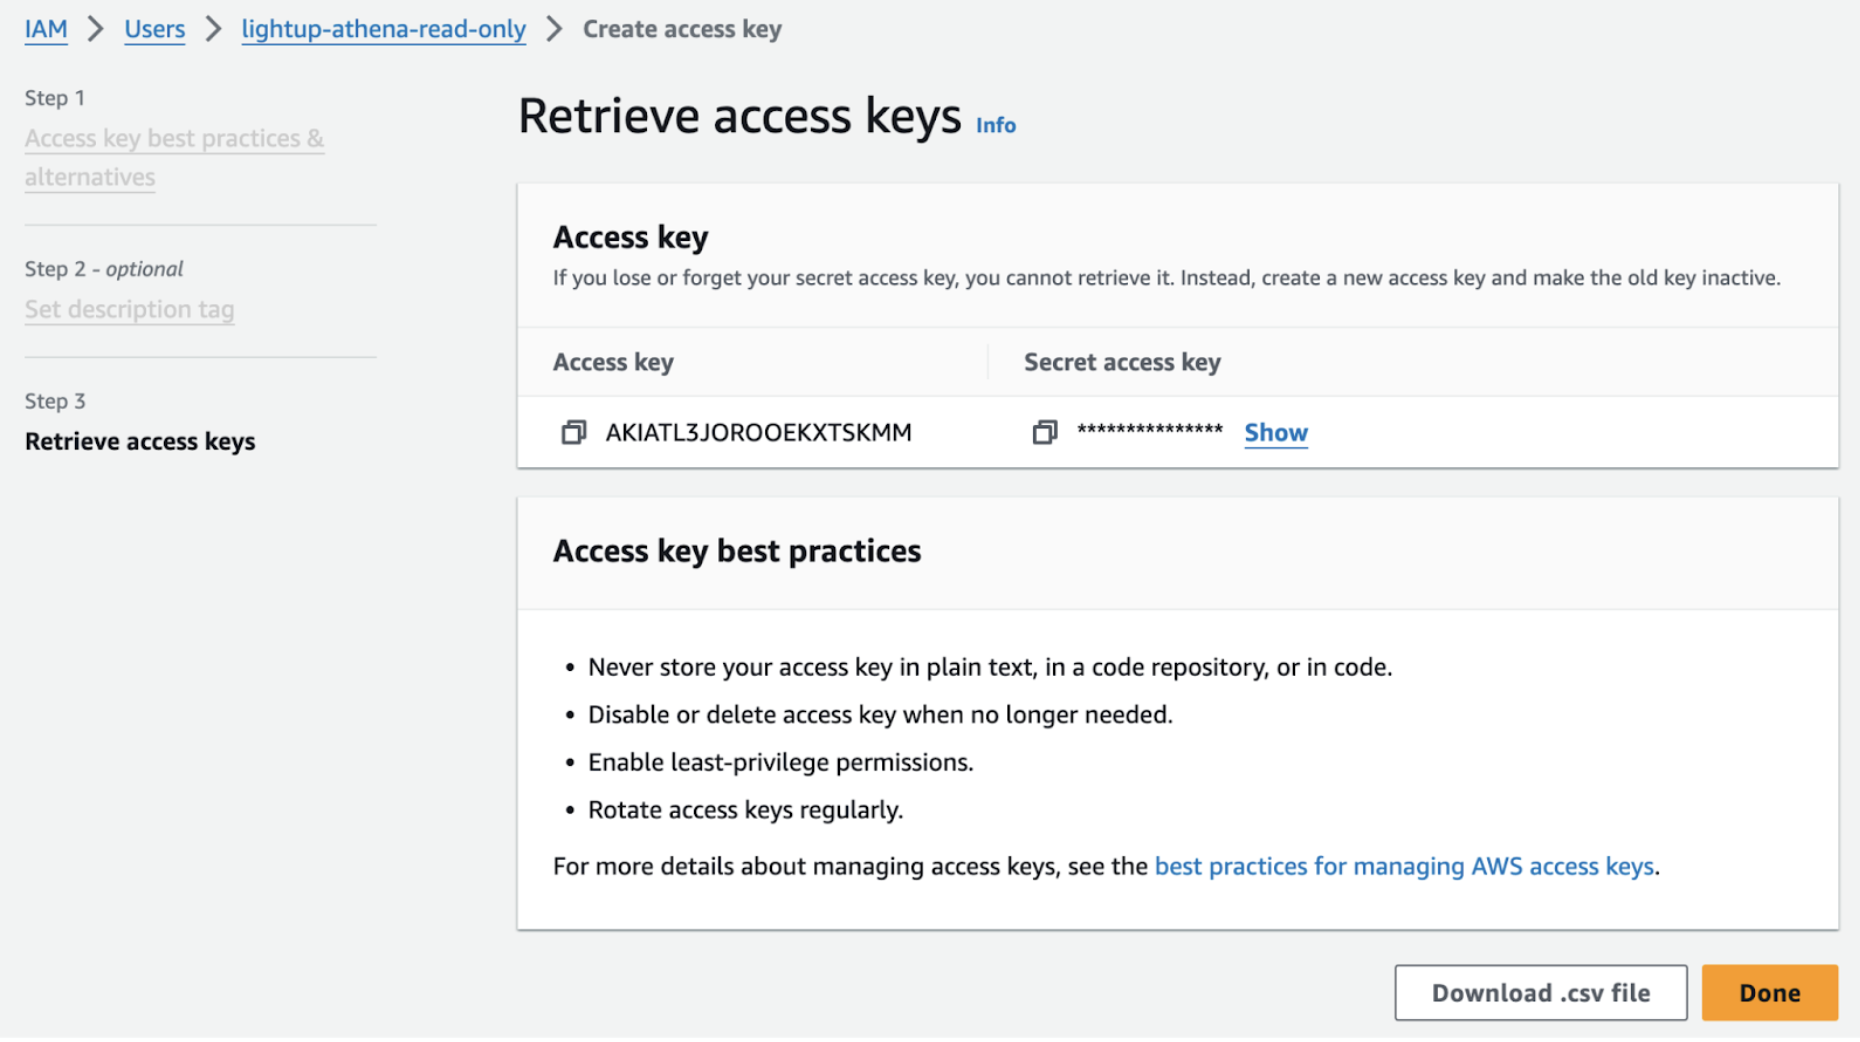
Remember the access key ID as well as the secret access key as it will be needed when Athena is configured in Lightup in the next step. Click Download .csv file to keep track of these keys.
Configure Athena in Lightup
Workgroup supportLightup supports Athena workgroups, which can help you manage costs and performance. A workgroup must be in place before you connect to the Athena datasource in Lightup— you can't add a workgroup to an existing datasource.
- For more information about Athena workgroups, please see the Athena help page, Manage queries and control costs with workgroups.
- To use a workgroup when you connect, enter the workgroup name in the datasource's Connector settings.
- In the left pane, open a workspace menu and select Datasources.
- In the main page select Create Datasource +.
- Enter a Datasource Name, then for Connector Type select Athena.
- Under Configure connector, provide the following inputs:
- Region - Specify the AWS Region where your data is hosted, e.g. "us-west-2". Read more about Athena Regions.
- Access Key ID - Part of the access key for the lightup user. If you didn't set up the lightup user account and don't know its Access Key ID, ask your system administrator for this information.
- Secret Access Key - Part of the access key for the lightup user. If you didn't set up the lightup user account and don't know its Secret Access Key, ask your system administrator for this information.
- Staging Directory - Enter the S3 bucket for your Athena query results bucket. It should start with s3://....
- Workgroup - If needed, enter a specific Athena workgroup to connect to.
Please note that Test Connection currently does not test the validity of the S3 staging directory as well as the workgroup so, please make sure that there are no typos.
- After entering the required settings and any optional settings that apply, below the Configure connector section select Test Connection.
- After a successful connection test, select Save.
- Your new datasource appears in the list of available datasources. By default, these are listed in alphabetical order, so you might have to scroll or change the sort order to see your new datasource.
Advanced/Schema scan frequency
You can adjust how often scans run for a datasource.
- In section 3 - Advanced, select a value for Schema scan frequency: Hourly, Daily, or Weekly.
Query Governance
Athena datasources support the Scheduling, Enable data storage, Maximum backfill duration, and Maximum distinct values settings. For steps, see Set query governance settings for a datasource.
Date/time data types
These Athena date/time data types are supported:
- DATE
- TIMESTAMP
Object types
These Athena object types are supported:
- Tables
- Views
Partitions
Athena datasources support partitions, multi-partitions, and partition time zones.
Supported Versions
Lightup currently supports:
- Athena SQL
Updated 10 months ago